Google is soon going to migrate all GTM accounts and containers to GTM V2 and the old GTM (or GTM V1) will no longer be available.
So if you are still using GTM V1, you have got around a month to get familiar with GTM V2 and start planning your migration, because things work little differently in GTM V2 and you don’t want to leave anything to the last minute.
GTM V1 is available at http://www.google.com/tagmanager .To access GTM V2 (still in beta) you need to go to: https://tagmanager.google.com/
If you are planning to create new GTM accounts and containers in the next couple of days/weeks then do it via GTM V2 and save yourself from the trouble of migrating to the new interface later.
What has changed in GTM V2?
GTM V2 Account and Container
Follow the steps below to create a new account and container in GTM V2:
Step-1: sign in to the GTM V2 https://tagmanager.google.com/, you will then see the home page which list all of the GTM accounts you have got access to:
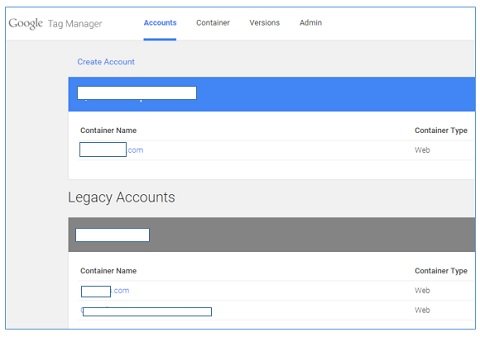
Home page of GTM V2
Each box on the home page of the new interface represents one GTM account. I have got access to several GTM accounts.
If you have got access to only one account or zero GTM account then your home page is going to look different (mostly blank) than my home page.
If you click on any one of the accounts listed on the home page, you will get the following message:
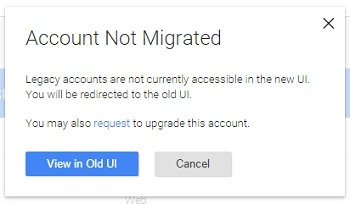
The GTM account that you are currently using is the legacy account and it is not accessible in the new user interface (i.e. in GTM V2).
So if you try to access your current GTM account from the home page of GTM V2, you will be redirected to the user interface of GTM V1.
But you don’t want auto-migration.
Remember what happened when Google auto migrated all Google Analytics account to Universal Analytics?
Ecommerce tracking stopped working. Event tracking stopped working. Lot of tracking issues and errors. If you carry out this migration on your own, you have a better chance of smooth and error-free migration.
If you let Google migrate your account, then best of luck.
This guide is all about getting familiar with GTM V2.
Step-2:
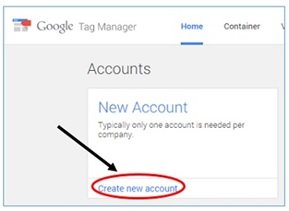
Click on the ‘create new account’ link on the home page. Generally only one GTM account is needed per company.
Note: You can create multiple GTM accounts from a single Google account.
Step-3:

Name your account (same as your company name), select the checkbox ‘Share data anonymously with Google and others’ (to enable benchmarking) and then click on the ‘continue’ button to setup container.
Step-4:
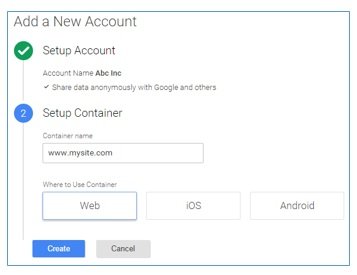
Enter the name of your container (same as your website name), select ‘Web’ (as here I am going to use my container on a website) and then click on the ‘create’ button.
Step-5:
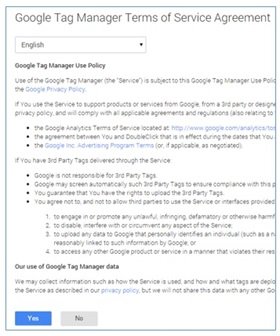
Accept Google Tag Manager Terms of service by clicking on the ‘Yes’ button. You have now created new GTM V2 account and container.
Step-6:
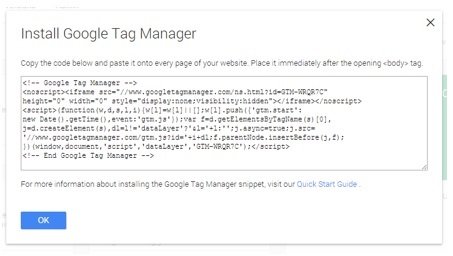
Copy-paste the GTM code (aka container code) on every page of your website immediately after the opening <body> tag and then click on the ok button.
You will now see the new GTM interface:
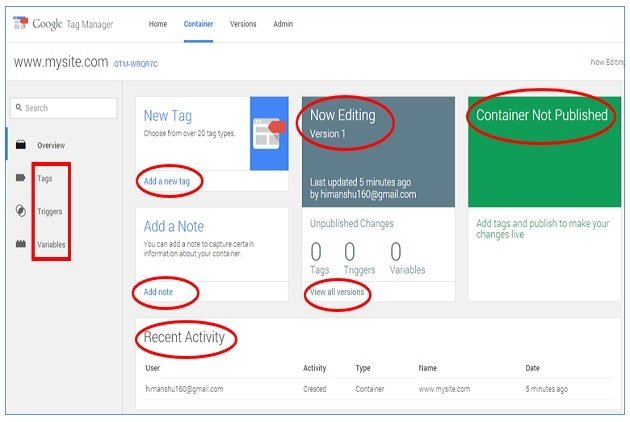
Pay special attention to the interface elements highlighted by red circle.
GTM V2 Tags
GTM V2 Tag Templates
Tag is used to collect and send information from your website/mobile app to a 3rd party service like Google Analytics, Google Adwords, Comscore, clicktale etc.
A tag template makes it easy to deploy a tag on your website. GTM V2 provides more tag templates than GTM V1.
GTM V2 Triggers
Creating a new trigger through the ‘Triggers’ menu
Rules are known as triggers in GTM V2.
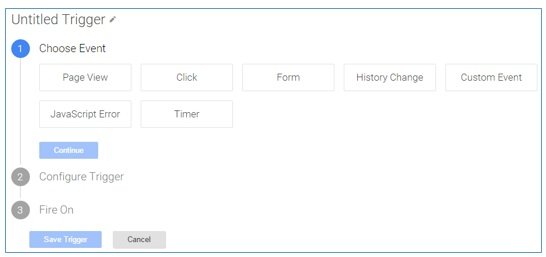
Following is an example of a trigger:
Trigger Events
A trigger event is one of the conditions when the trigger should fire/execute. Following are the various events when a trigger can be fired:
In GTM v2, triggers have been made an integral part of a tag creation process, so you can not create a tag without first creating corresponding trigger.
There are two methods of creating a trigger in GTM v2: one is while you are creating a new tag and one is through the triggers menu.

Creating a trigger while creating a new tag
Click Trigger
When you click on the ‘Click’ trigger button, you see an ‘Create trigger’ dialog box through which you can select trigger type: ‘click’ or ‘link click':
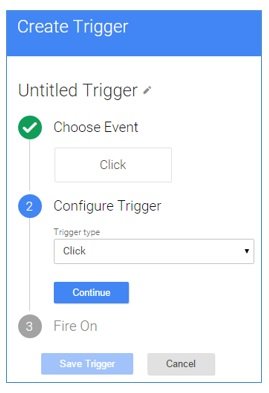
If you select ‘Click’ from the drop down menu, your tag can fire on any click on your website, no matter which element a user clicks on. If you select ‘Link Click’ from the drop down menu, your tag will fire only on clicks on a link(s).
Once you have selected ‘Link Click’ as trigger type, you will see additional fields: ‘Wait for Tag‘, ‘Check for validation‘ and additional filter field:
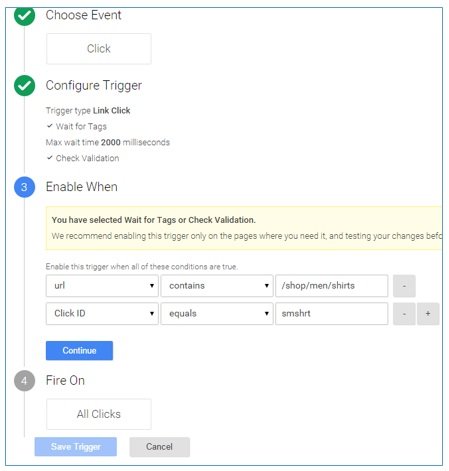
You also need to set up filters to specify when your link click trigger should fire. For example, I want to fire a tag on the page whose URL contains ‘/shop/men/shirts/’ and when the ‘Click ID’ is ‘smshrt’. That’s why I set up the following filters:
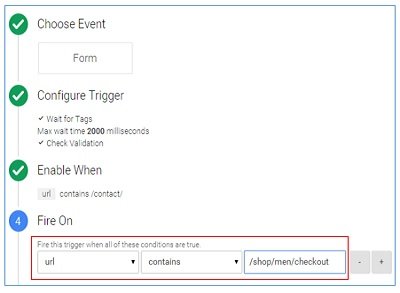
Form Trigger

When you click on the ‘Form’ trigger button, you see a ‘Create trigger’ dialog box:
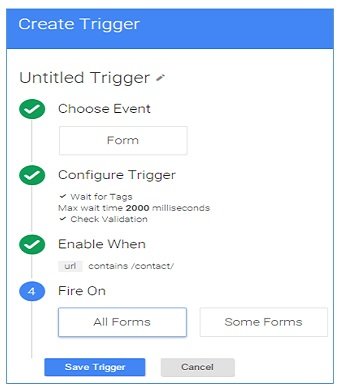
If you select ‘All Forms’, your tag will fire on submit event for any form.
If you select ‘Some Forms’, your tag will fire on submit event but only for selected forms. While configuring your ‘Form’ trigger you get the option to select ‘wait for tags‘ and ‘check validation‘.
You also need to set up filters to specify when your form trigger should fire. For example, I want to fire a tag on the page whose URL contains ‘/shop/men/checkout’ because this page contains my form. That’s why I set-up the following filter:
GTM V2 Blocking Triggers
In GTM V2 you have two type of triggers: Firing triggers (commonly known as triggers) and blocking triggers.
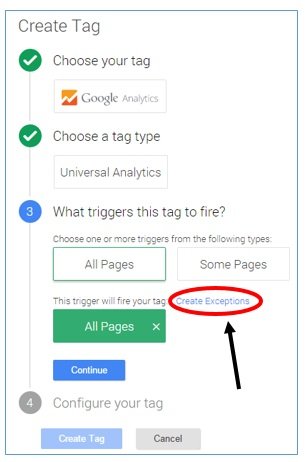
You can create a blocking trigger (or blocking rule) by clicking on the ‘Create Exceptions‘ link while creating your tag. The whole process of creating a blocking trigger is same as in the case of creating a regular trigger.
Note: If your trigger contradicts your blocking trigger then the blocking trigger takes precedence.
For example, if you set a trigger to fire tag on all pages of your website and then you set a blocking trigger which prevents the same tag from firing on the ‘order confirmation’ page then then your tag will not fire on the ‘order confirmation’ page even when the tag is supposed to fire on all pages of your website according to the firing trigger.
GTM V2 Variables
In GTM V2, macros have been renamed as variables.
For example,
Here {{url}} is a predefined variable
A data layer passes information to container tag via variables. A variable can retrieve runtime information:
In GTM v2, there are two categories of variables:
- Built-in variables (or predefined variables)
- User defined variables
Following are the examples of ‘built-in variables’ in GTM V2:
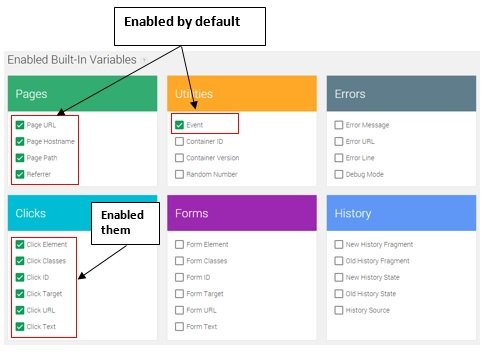 Built-in variables are predefined variables. These variables make setting up tags and triggers easier.
When you first create a new container, you will find that few built-in variables (page URL, page hostname, page path, and referrer) are already enabled (i.e. selected by default).
Once a built-in variable is enabled, it is instantly available to be used while setting up various tags and triggers.
Following are the examples of user-defined variables in GTM V2:
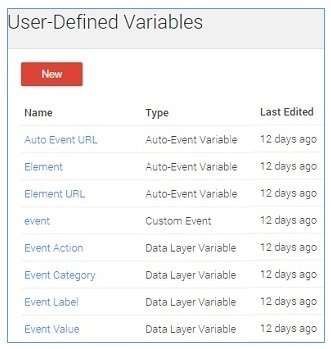 As the name suggest, the user defined variables are defined by people like me and you.
Setting up Universal Analytics via GTM V2
The purpose of this exercise is to make you familiar with the GTM V2 interface and help you in moving around with ease. You will learn to create a new tag, debug it and then publish it on a website.
Follow the steps below to set up Universal Analytics via GTM V2:
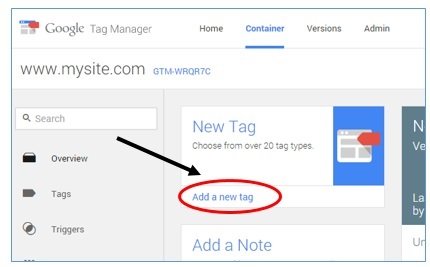
Step-1:Click on ‘Add a new tag’ link on the account ‘overview’ page of GTM V2:
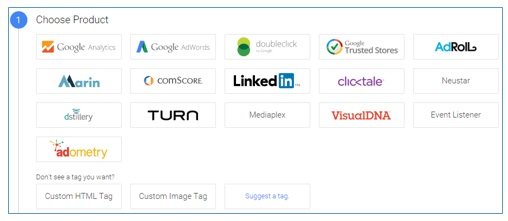
Step-2: Name your tag ‘Universal Analytics Tracking Code’ and select ‘Google Analytics’ from the ‘Choose Product’ section because that is what I want to install on my website:
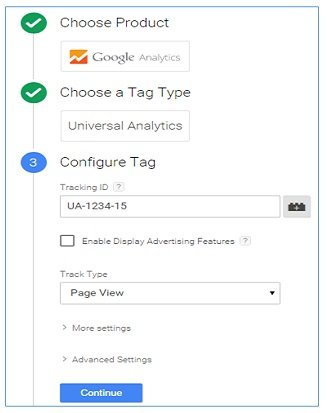
Step-3: Click on the ‘continue’ button and then choose ‘Universal Analytics’ as a tag type. I selected ‘Universal Analytics’ because I want to install Universal analytics on my website:

Step-4: Click on the ‘continue’ button and then configure your ‘Universal Analytics tag’ by entering your tracking ID:
Step-5: Click on the ‘continue’ button and then select the trigger (aka rule) when the tag should be fired. I selected ‘All pages’ because I want my Universal Analytics tag to fire on all pages of my website:
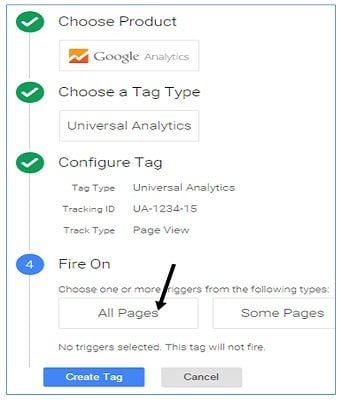
Step-6: Click on the ‘create Tag’ button to create your new tag.
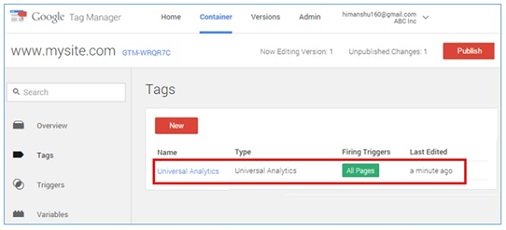
You will now see your new tag listed:
Step-7:
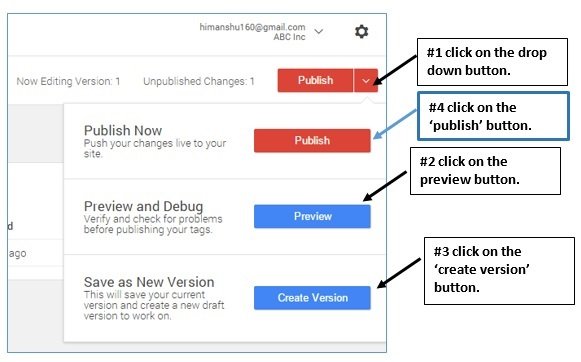
Click on the drop down button next to the ‘Publish’ button and then on the ‘preview’ button to test your tag on your website. Once you have clicked on the ‘preview’ button, you will see a message like the one below:
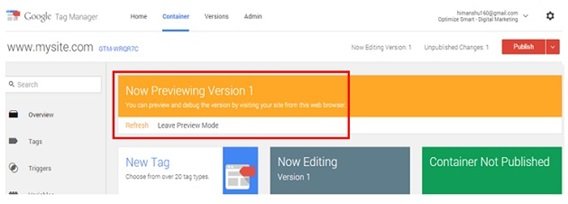
You are now previewing version 1 of your container.
Step-8: Now visit your website and look for a debugging window like the one below at the bottom of a web page:
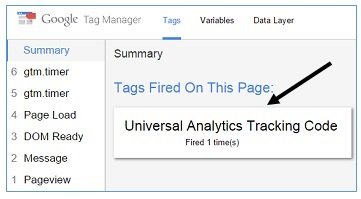
This debugging window is telling you that if you publish your Universal Analytics tag on the live website, it will fire/execute.
Note: Make sure that not only the tag is firing but it is also not breaking the website design and/or functionality in any way.
Step-9: Head back to GTM V2 and click on the ‘Leave Preview Mode’ link once you have tested your new tag:
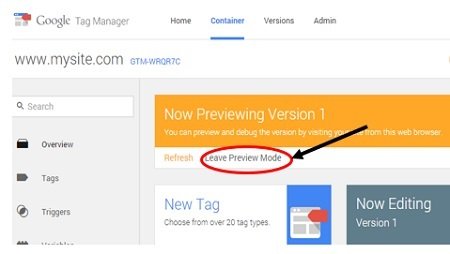
Once you clicked on the link, you will see following dialogue box:
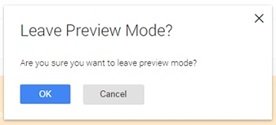
Click on the ‘ok’ button.
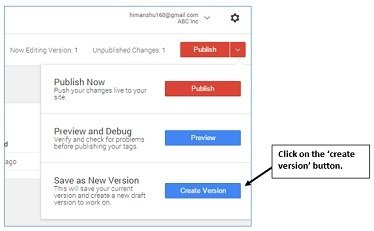
Step-10: Click on the ‘create version’ button:
You will then see a dialog box like the one below:
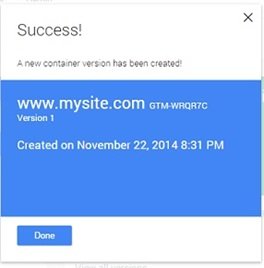
Click on the ‘Done’ button. You have now created a new container version.
Step-11: Click on the ‘Publish’ button:
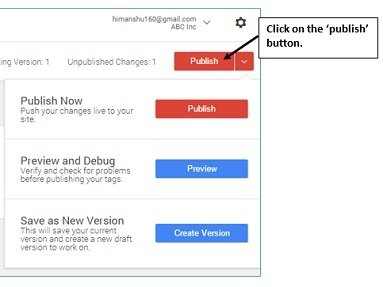
This will open a new dialog box:
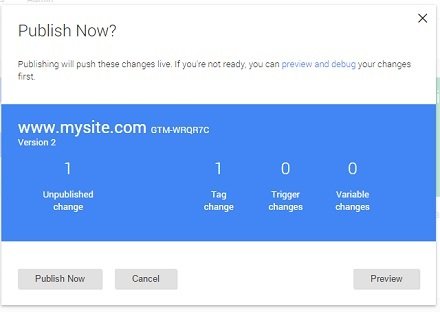
Click on the ‘Publish Now’ button. You will then see another dialog box:
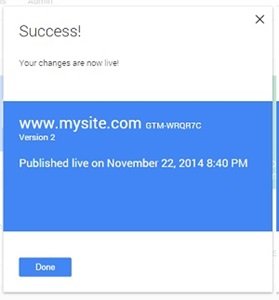
Click on the ‘Done’ button. This task will install universal analytics on your website via GTM V2.
Step-12: Now remove the Universal Analytics tracking code from all of the web pages on your website. If you are already using GTM then remove the old GTM container code from all of the web pages.
However if you have additional tracking installed (like ecommerce tracking, event tracking, cross domain tracking, scroll tracking, video tracking etc) on your website, then don’t remove the old container code for now.
That’s how you create new tags in GTM V2. If you have used GTM before, you now know that things work little differently in GTM V2.
How to migrate your account to Google Tag Manager V2
Now you have got two options for migrating your account from GTM V1 to GTM V2:
Off-course I am going to explain the second option.
Follow the steps below to migrate your GTM V1 account to GTM V2:
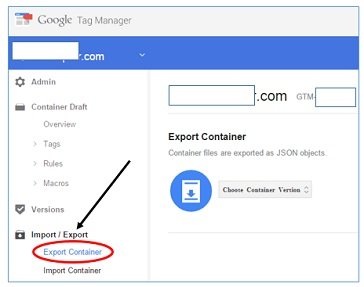
Step-1: Go to your old GTM V1 account at http://www.google.com/tagmanager and then click on Import/Export > Export Container
Step-2: Select the most recent container version from the ‘Choose Container Version’ drop down menu:
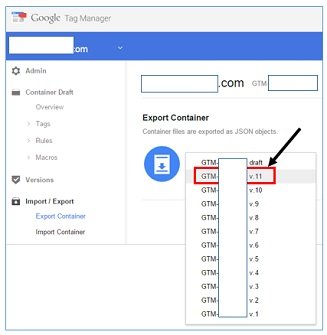
As soon as you select a container version, you will see a code window like the one below:
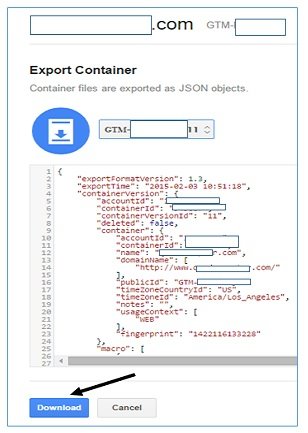
Click on the ‘download’ button to download the container to your hard disk.
Note: The container file is a JSON file and has got the extension .json
Step-3: Go to GTM V2 at https://tagmanager.google.com/ and then create a new account there.
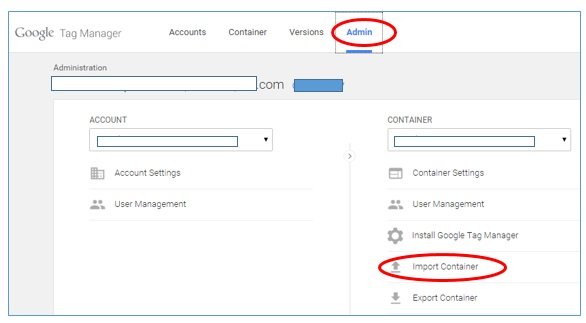
Step-4: In the new GTM V2 account, click on the ‘Admin’ link and then click on the ‘Import Container’ link as shown below:
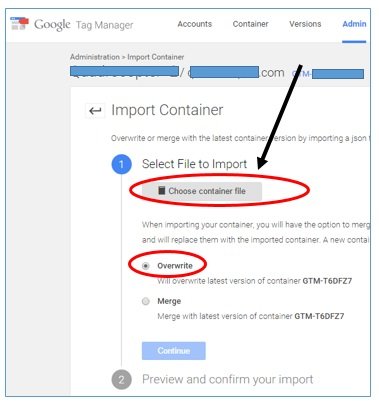
Step-5: Select your container file by clicking on the ‘Choose Container file’ button. Make sure that ‘Overwrite’ button is selected and then click on the continue button:
Step-6: Preview your import by clicking on the ‘view detailed changes’ link:
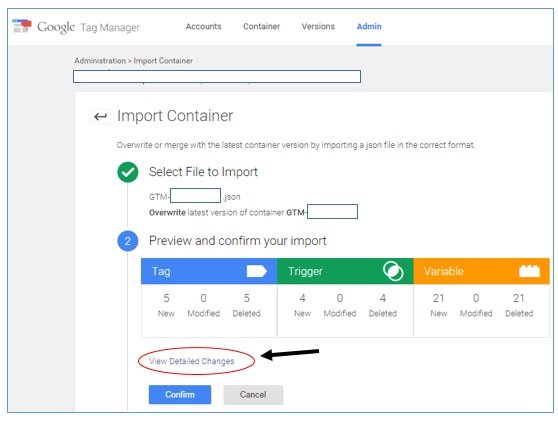
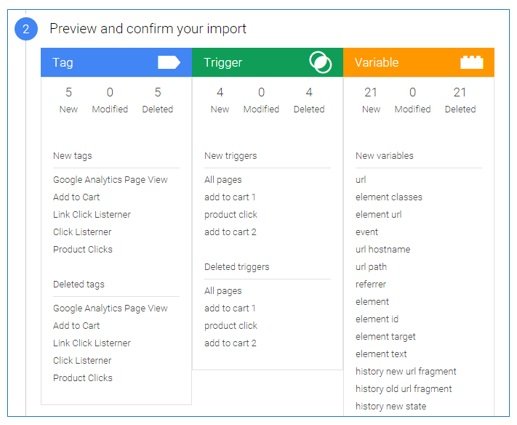
Step-7: Click on the ‘Confirm’ button to start the import. Once the import is complete, you can see all of your tags, triggers and variables in the new GTM V2 account.
Step-8: Remove the old GTM V1 container code from all of the web pages on your staging website and replace it with the new GTM V2 container code.
Step-9: Test and publish the new container.
Step-10: Once everything is working as intended, then remove the old GTM V1 container code from all of the web pages on your live website and replace it with the new GTM V2 container code.
Step-11: Test and publish the new container.
Article Source is from http://www.optimizesmart.com/beginners-guide-google-tag-manager-v2/
No comments:
Post a Comment